
Tag Archive for: Instrument Cluster Repair

guide to retaining mileage and coding

Your Guide to Retaining Mileage and Coding

A failed instrument cluster can leave a vehicle looking far worse than it is. A blank LCD, dead gauges or intermittent warning lights do not automatically mean the dashboard needs replacing. This guide to retaining mileage and coding explains why original-cluster repair often offers the better route. It keeps the vehicle’s recorded information, factory configuration and familiar unit intact.

For motorists, that means avoiding unnecessary dealer replacement costs and reducing time off the road. For garages and workshops, repair offers a practical route for specialist dashboard faults. It avoids passing an expensive, open-ended job back to the customer.

Retaining mileage and coding: what the cluster stores

The instrument cluster is more than a display. On most modern cars, vans and motorhomes, the cluster acts as an electronic control unit. It holds memory, vehicle settings and links to other modules. It receives vehicle data and shows speed, fuel level and mileage. It also displays warnings and service information.

Mileage is the recorded distance the vehicle has travelled. Different makes, models and ages store this information in different places. The cluster may hold it, while other control modules may store or verify a matching record. Fitting a used dashboard without the right process can create a mileage discrepancy. It can also trigger warnings or communication faults.

Coding is the configuration that tells a cluster how it should operate in that specific vehicle. Coding can cover the engine, transmission, fuel tank and warning lamps. It may also control language, market, display and communication settings. A cluster from an apparently identical vehicle may still be unsuitable if its coding does not match.

Retaining both is about preserving the vehicle’s original identity in the dashboard, not simply making a replacement unit light up.

Why repairing the original unit is usually the best option

Repairing the original cluster keeps it matched to the vehicle it came from. Its mileage information and coding stay with the unit, avoiding many of the complications associated with replacement dashboards.

This approach offers most value when a known, repairable issue causes the fault. Common examples include pixel loss, dim or failed backlighting, faulty gauges and power faults. Technicians also repair failed warning lights, intermittent screens and complete internal failures. The vehicle may be mechanically sound, while the dashboard electronics simply need specialist attention.

A replacement cluster can introduce extra work. A replacement may require sourcing, coding, adaptation and compatibility checks. In some cases, it can require security-related procedures or dealer-level access. The part itself may cost considerably more. The vehicle can also remain off the road while the workshop locates and configures the correct unit.

Repairing the original unit avoids replacing a component that is already physically correct for the vehicle. Repair also preserves originality. That matters to owners who want an accurate vehicle history and no unexplained dashboard changes.

A guide to retaining mileage and coding during repair

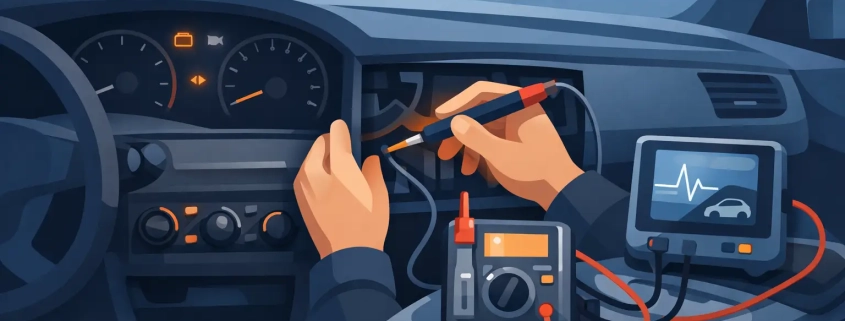
The most reliable approach identifies the fault before anyone starts work. A dead-looking cluster may have an internal fault. Vehicle wiring, poor power, CAN communication or another module can create the same symptom. Proper diagnosis stops technicians from repairing the wrong component.

After testing confirms the cluster as the cause, the technician should restore its original electronics instead of substituting the whole unit. A specialist can test the cluster with suitable equipment and emulators. The technician then repairs failed circuits or display components and checks the result before refitting.

The key point is to retain the original memory and configuration wherever possible. This means the dashboard returns with the mileage and coding it had before the fault occurred. This avoids treating the vehicle as though it has received an unrelated used module.

There are exceptions. Severe water damage, fire damage, physical destruction or a failed memory device can make a straightforward repair impossible. In those cases, the correct process depends on the vehicle and available data. A specialist should assess the available original information. The result determines whether technicians can recover it accurately or must programme a replacement for the vehicle.

There is no one-size-fits-all answer across every manufacturer. Audi, Ford, Fiat, Alfa Romeo, Aston Martin and other makes use different cluster designs, memory layouts and security arrangements. The right repair method depends on the exact model, year and fault, not just the badge on the bonnet.

Retaining mileage is not the same as altering it

There is an important distinction between preserving correct mileage during a repair and changing mileage to misrepresent a vehicle’s history. The former is a legitimate part of restoring an original instrument cluster. Changing mileage to deceive a buyer or conceal a vehicle’s true use can break the law.

A professional repair should keep the vehicle’s recorded mileage accurate and consistent. It should not create a lower or invented reading. When a dashboard fault hides the display or makes it erratic, the repair should restore the original unit. It should also preserve the correct information.

Owners should also keep repair invoices and any relevant vehicle records. These records explain why the dashboard work took place, especially when the owner later sells the vehicle. For trade customers, clear job notes protect the workshop and vehicle owner. They record the reported fault, completed repair and result.

What can go wrong with a replacement cluster

A replacement dashboard can look like the quick fix, particularly when a used unit is readily available. However, programming, compatibility checks and lost workshop time can turn the lowest-priced part into a more costly repair.

The replacement may display the wrong mileage or unsuitable warnings. It may also fail to communicate or use the wrong display settings. It may also carry its own unknown history. A breaker’s cluster could contain hidden faults or damaged pixels. Its internal hardware may differ despite a matching part number.

Even where a new unit is available, replacement can mean dealer-level coding and a higher bill. The customer may also lose the original cluster. Keeping that unit often provides the best way to preserve its data, history and factory specification.

That does not mean replacement is never appropriate. If the casing, circuit board or memory is beyond economical repair, replacement may be the sensible choice. The difference is that it should follow a proper assessment, rather than being the default response to every dashboard fault.

Checks for retaining mileage and coding during repair

Before removing a cluster, record the symptoms clearly. Does the display fail only when cold? Are some gauges working while others remain at zero? Is the issue intermittent? Does the vehicle start and drive normally? Specific symptoms help distinguish a cluster fault from a wider electrical problem.

It is also sensible to note the current mileage, photograph the dashboard where possible and record any warning messages. This gives the repairer a clear reference point and helps the owner keep accurate records. Do not open the cluster, resolder components or fit a used unit unless you have the equipment and expertise to diagnose the consequences. Unnecessary interference can turn a repairable fault into a more complicated job.

Garages should supply the make, model, registration and year. Include the engine, transmission and a concise fault description too. If diagnostic trouble codes are available, include them. Good information reduces delays. It also helps the specialist confirm the correct repair route quickly.

Choosing a repair service that protects the original unit

Ask whether the service repairs the cluster itself or simply offers replacement. A repair-led approach is usually the right choice where mileage retention, coding preservation and original vehicle specification matter.

Turnaround also matters. A vehicle without a working speedometer or warning display may not suit normal use. A workshop ramp is also an expensive place for it to wait. Look for clear turnaround expectations, suitable diagnostic capability and a warranty that gives confidence after refitting.

Cartronix repairs original instrument clusters for many modern vehicles. Postal repairs cover the UK, while suitable units qualify for workshop appointments. The aim is straightforward: resolve the cluster fault and retain its original mileage and coding where possible. This gets the vehicle back into service without unnecessary replacement costs.

If your dashboard fails, keep the original cluster safe and record the symptoms. Ask a specialist to assess it before buying another unit. Retaining mileage and coding starts with the vehicle’s original unit. In many cases, repairing that dashboard provides the quickest route back to normal use.
how to repair dim dash lights

How to Repair Dim Dash Lights Without Guesswork

A dashboard that is difficult to read after dark is more than an irritation. If you cannot clearly see your speed, fuel level, warning messages or temperature gauge, it can affect safe driving. Knowing how to repair dim dash lights starts with identifying whether the fault is a simple illumination setting, a vehicle wiring issue or an internal instrument cluster failure.

On modern cars, vans and motorhomes, a blown bulb does not always cause dim dash lights. Many instrument clusters contain surface-mounted LEDs, regulated power supplies and display circuits within the original unit. Replacing parts without proper diagnosis can waste time, create further faults and, in some cases, leave the vehicle with warning lights or communication errors.

Check the simple causes first

Before removing the dashboard or booking a repair, rule out the obvious. Someone may have knocked the dimmer control down, particularly when its wheel sits beside the steering column. Some cars also adjust interior brightness automatically through a light sensor, so the display may appear different in daylight, shade and darkness.

Check these four areas before assuming the cluster itself has failed:

  • Set the dash illumination dimmer to full brightness and confirm that it changes the lighting level.
  • Switch on the sidelights or headlights because some dashboards only reach full brightness with exterior lights active.
  • Relevant fuses are intact and show no signs of heat damage or corrosion.
  • Other interior lighting, such as heater controls, radio buttons and window switches, is working normally.

If every illuminated control in the cabin is dim or dead, the issue may sit outside the instrument cluster. A fuse, earth connection, lighting control module, headlamp switch or vehicle body control system could be responsible. If only the dashboard shows the fault, inspect the cluster or its connector first.

Why dash lights become dim

The cause depends on the vehicle’s age, design and symptoms. Earlier dashboards may use replaceable filament bulbs for backlighting. A failed bulb can leave one part of the speedometer or rev counter darker than the rest. On newer vehicles, manufacturers commonly solder LEDs to the circuit board. These can fail, but a weak LED is not necessarily the root cause.

Repeated heat cycles can damage solder joints, degrade electronic components or cause a power supply circuit to deliver the wrong voltage. A display may look faint across the whole panel or flicker as the cabin warms. It may also return briefly after the driver restarts the car. These are useful clues for diagnosis.

Pixel displays and LCD screens can also appear dim because of a failing backlight, ribbon connection or display driver. This is particularly common where the central information screen loses contrast, develops missing lines or becomes unreadable in hot weather. A separate warning lamp fault may point to failed LED channels or an internal circuit fault rather than a general brightness problem.

How to repair dim dash lights safely

If the dimmer, exterior-light setting and fuses are all correct, avoid treating the dashboard as a simple bulb-change job. Instrument clusters often contain the vehicle mileage, coding, immobiliser data and configuration information. Fitting a used unit can introduce mileage discrepancies, warning messages and compatibility problems, even if it physically fits.

A sensible first step is to confirm the fault pattern. Does the entire cluster dim, or only one gauge? Does it change when you switch on the headlights? Are warning lights, the LCD display and gauge needles otherwise working correctly? Does the fault occur constantly or only after a period of driving? Clear answers help separate an illumination problem from a wider cluster failure.

Where a vehicle uses replaceable bulbs and the rear of the cluster is accessible, a competent technician may be able to replace the failed lamps. Use the correct bulb type and rating. A higher-wattage bulb is not a fix for a dim panel and may overheat the housing or create uneven illumination.

For LED-equipped clusters, circuit-board repair requires the correct equipment and experience. It may involve testing LED outputs, checking voltage regulation, replacing failed components and repairing damaged tracks or solder joints. A technician should assess the unit properly instead of changing LEDs at random.

When the fault needs specialist diagnosis

A specialist repair is usually the right route when the dashboard has widespread dimming, intermittent operation, failed warning lamps, pixel loss or a screen that is fading alongside other faults. These symptoms often share an internal cause, and repairing the original unit is normally preferable to replacement.

Professional diagnostics can test the cluster outside the vehicle using dedicated emulators and controlled power supplies. This helps confirm whether the fault is inside the unit before repairs begin. It also avoids replacing a dashboard when the actual issue is a vehicle feed, CAN communication fault or connector problem.

Original-unit repair preserves the existing mileage and coding where possible. That matters on many Audi, Aston Martin, Fiat, Ford and Alfa Romeo applications, as well as a wide range of other vehicles from 1996 onwards. It can also be quicker and more economical than ordering a new dealer-supplied cluster, then paying for programming and installation.

For garages, accurate diagnosis prevents a common and costly mistake: condemning the cluster without checking its power, earth and network inputs. For vehicle owners, it means the repair addresses the actual fault rather than masking it with a second-hand part of unknown history.

Repair or replace the instrument cluster?

Severe water damage, physical breakage or unavailable repair parts can make replacement necessary. Even then, it is worth establishing the full condition of the original cluster first. A replacement unit may require coding, component protection procedures or mileage correction carried out lawfully and transparently for the vehicle.

Repair often offers the better option when the original cluster only has dim backlighting, failed LEDs, LCD faults, gauge problems or intermittent operation. You retain the dashboard designed for the vehicle, avoid unnecessary coding complications and reduce downtime. The best choice still depends on the exact make, model, year and fault, which is why a fault-specific assessment is more useful than a generic answer.

Avoid making the problem worse

Do not spray electrical cleaner into the front of the cluster, force needles off the gauges or use household bulbs as substitutes. Disconnecting and reconnecting the dashboard repeatedly can also create additional fault codes, while poor soldering can permanently damage delicate circuit tracks.

If you remove the cluster yourself, disconnect the battery only in line with the vehicle manufacturer’s procedure and take care around steering-column trims and airbag components. Photograph connector positions, do not pull on wiring, and keep the unit dry and protected from static damage. In many cases, leaving removal to an experienced workshop is the lower-risk option.

The need to repair dim dash lights rarely disappears on its own. If the simple checks do not restore normal brightness, a proper repair of the original unit can keep the vehicle readable, correctly coded and on the road without dealer replacement costs. Cartronix can assess instrument cluster faults for postal customers nationwide or through while-you-wait workshop appointments, with repairs backed by a lifetime warranty for as long as you own the vehicle.

warning light backlight repair

Warning Light Backlight Repair: What Fails and Why

A warning symbol can still be working electrically while remaining almost impossible to see at night. That is where warning light backlight repair becomes necessary. If one area of the instrument cluster is dim, several warning lamps have lost illumination, or the dashboard is completely dark with the ignition on, the fault may be inside the cluster rather than with the vehicle’s warning system itself.

For drivers, this is more than an annoyance. A poorly illuminated dashboard can hide important alerts and make the vehicle harder to use safely after dark. For garages, it can create a difficult diagnosis: the vehicle may report no stored fault codes, yet the customer can clearly see that the cluster is not displaying correctly.

What does warning light backlight repair involve?

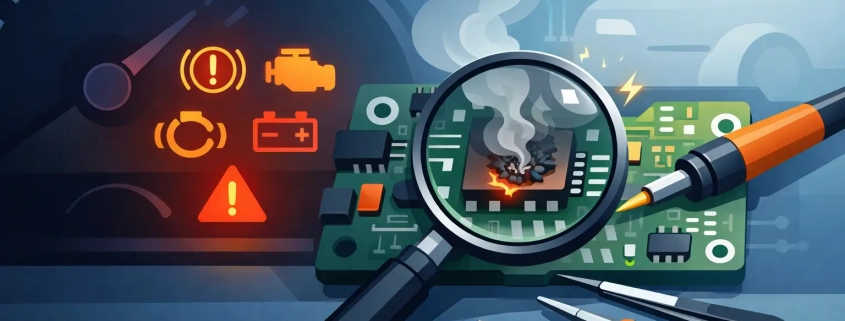
Most modern instrument clusters use small surface-mounted LEDs and electronic driver circuits to illuminate warning symbols, gauges and display areas. Unlike older dashboards with replaceable bulbs, manufacturers solder these components directly to the circuit board. Accessing them normally requires careful removal of the cluster, dismantling the housing and testing the electronics at component level.

Warning light backlight repair focuses on restoring the illumination without replacing the complete instrument cluster. Depending on the fault, this can mean replacing failed LEDs, repairing damaged tracks or solder joints, correcting a fault in the illumination driver circuit, or addressing heat damage on the circuit board.

The objective is simple: return the original unit with the correct brightness and operation, while retaining the vehicle’s existing mileage, configuration and coding. This is often preferable to fitting a replacement dashboard that may need programming, mileage correction or security matching before it will work correctly.

Signs the backlight fault is inside the cluster

A dim dashboard does not automatically mean the instrument cluster has failed. Start with the obvious checks: dashboard dimmer settings, relevant fuses, battery condition and charging voltage. If the vehicle has recently had electrical work, water ingress or a flat battery, these details can also help pinpoint the cause.

However, a cluster fault becomes more likely when the problem affects only one section of the display or warning lights. Typical symptoms include a warning symbol that disappears at night or a dark patch across one gauge. Some lights also react to bumps or fade as the cabin warms.

Some vehicles develop combined faults. The warning lights may be dim, the LCD may lose pixels, needles may behave erratically, or the cluster may intermittently fail to power up. These symptoms can share a cause, particularly where ageing solder joints, failed components or heat-related damage affect the circuit board.

Backlight failure is not the same as a warning light fault

Drivers must distinguish between an active warning lamp and a symbol with failed illumination. For example, a fault elsewhere on the vehicle may trigger the engine management warning. A failed backlight or LED can hide the symbol even when the cluster receives a command to show it.

The same applies if every warning lamp appears permanently lit. That may be a communication, power supply or internal cluster issue rather than a collection of separate vehicle faults. Proper diagnosis prevents unnecessary replacement of sensors, control units or the complete dashboard.

Common causes of dim or failed warning light illumination

Heat is one of the main causes. Instrument clusters sit behind the dashboard, where they experience years of temperature changes. Normal vehicle use repeatedly heats and cools the LEDs, driver chips and solder joints. Over time, an LED can fail, a solder joint can crack, or a component can become unstable once warm.

Voltage issues can also contribute. A weak battery, poor earth connection, alternator fault or jump-starting error can put stress on sensitive dashboard electronics. The cluster may continue working at first, but extreme heat can push weak components beyond their limit.

Water ingress is another concern. Condensation or a leaking windscreen can affect connectors and circuit boards, while a drink spill around the dashboard may cause damage that only becomes apparent later. In these cases, the repair must address corrosion and contamination as well as the failed lighting components.

Finally, previous repair attempts can complicate the job. Incorrect LEDs, excessive heat during soldering, lifted circuit tracks and poorly matched replacement parts can produce uneven illumination or create additional faults. Modern clusters are repairable, but they need the right equipment and experience.

Why replacing the whole cluster is not always the answer

A main dealer replacement may suit a unit with severe physical damage or unavailable repair parts. But for a lighting fault, replacing an entire instrument cluster can be disproportionate. The replacement part may be costly, it may need ordering, and the vehicle can require coding and mileage programming before it is usable.

There is also the question of originality. The instrument cluster carries part of the vehicle’s history and often connects to its electronic security systems. Keeping the original unit avoids unnecessary complications and helps preserve the vehicle exactly as it is.

Specialist repair usually costs less and takes less time when the problem affects only the cluster electronics. At Cartronix, technicians test the original unit with specialist equipment and emulators where required. They repair it at component level and check it before return. This approach keeps the original mileage and coding instead of transferring the problem to a replacement unit.

What warning light backlight repair should include

The quality of the diagnosis matters as much as the repair itself. A dashboard can look correct on the bench yet fail in the vehicle when testing misses a power, communication or thermal issue. Equally, replacing one failed LED without checking the surrounding circuit can lead to a repeat fault.

A professional warning light backlight repair should begin with confirmation of the reported issue. Technicians inspect the unit for previous work, liquid damage and overheating. They then test the relevant illumination circuits instead of assuming that every dark area has the same cause.

Technicians replace failed components with suitable parts and check the affected area for consistent brightness. Finally, the technician function-tests the cluster before return. Where a unit has related faults, such as pixel loss, gauge issues or intermittent power-up, it is sensible to identify these at the same time. Repairing the cluster once is generally better than removing it again a few weeks later.

Postal repair or while-you-wait appointment?

The best option depends on the vehicle and the customer’s required turnaround. A postal repair suits customers and garages anywhere in the UK. It works best when a trained person can remove the cluster safely and the customer can keep the vehicle off the road during the repair. It also gives workshops a straightforward way to send specialist electronic work out without losing control of the customer job.

A while-you-wait appointment can suit local customers who need to minimise downtime. For suitable bookings, the team removes, repairs and refits the cluster during the visit. Before removing any cluster, check whether the vehicle needs the unit connected for immobiliser, mileage or warning-system functions, and avoid driving the vehicle with key dashboard information unavailable.

Questions to ask before booking a repair

Give the repairer as much detail as possible. The vehicle make, model, year, registration and exact symptom all help. It is useful to explain whether the fault is permanent or intermittent, whether it changes with the dimmer control, and whether it began after a flat battery, jump start, water leak or other electrical issue.

For trade customers, include any diagnostic findings, known fault codes and whether communication with the instrument cluster is present. This does not replace specialist testing, but it saves time and helps separate a cluster fault from a vehicle-side wiring or control module issue.

Avoid services that offer only a quick bulb change. On many 1996-onwards vehicles, there is no conventional bulb to replace. The work is electronic repair, and the result depends on correct component selection, controlled soldering and thorough testing.

How to protect the cluster after refitting

If poor charging voltage, water ingress or a weak earth caused the failure, correct that underlying issue. Otherwise, the same conditions can damage the repaired cluster again. A battery and charging-system check is a sensible precaution after any dashboard electrical fault.

Refit the cluster carefully. Handle trim clips, connectors and screws correctly. Do not press or force the display lens or needle faces. Once installed, confirm the warning lamp self-test, illumination level, gauges, LCD functions and any steering-wheel display controls before handing the vehicle back.

A dim warning lamp is easy to ignore until it masks something the driver needs to see. Repairing the original cluster promptly restores clear night-time visibility, avoids unnecessary replacement costs and keeps the vehicle’s dashboard working as it should.

speedometer needle stuck repair

Speedometer Needle Stuck Fix for Modern Cars

A speedometer needle stuck fix is rarely as simple as freeing a jammed needle. On most cars built from 1996 onwards, the gauge is part of an electronic instrument cluster. The needle may be receiving no vehicle-speed signal, the gauge motor may have failed, or the cluster itself may have an internal fault. Getting the diagnosis right matters because replacing a cluster unnecessarily can create avoidable costs, mileage issues and coding problems.

If the needle is fixed at zero, stuck at one speed or moves erratically, start by identifying the fault pattern. It can point to whether the problem lies with the vehicle, its wiring or the dashboard electronics.

What a stuck speedometer needle usually means

A speedometer is not always measuring speed directly at the wheel. In many modern vehicles, a sensor sends vehicle-speed data to an ECU or ABS module, which then passes that information over the vehicle network to the instrument cluster. The cluster processes the data and drives the gauge needle with a small stepper motor.

That means a stuck needle has several possible causes. A failed gauge motor is common on certain clusters, especially where the needle stays in one position or sweeps incorrectly when the ignition is switched on. A cluster circuit-board fault can cause a dead speedometer alongside other symptoms such as intermittent warning lights, dim illumination, failed LCD sections or other gauges behaving strangely.

Where the speedometer has stopped but the cluster otherwise appears normal, the fault may be external. A wheel-speed sensor, vehicle-speed sensor, damaged wiring, poor connector connection or ABS-related issue can prevent speed information reaching the dash. The exact route depends on the make, model and year.

First checks before arranging a speedometer needle stuck fix

There are a few useful checks that do not involve dismantling the dashboard. Note exactly when the fault occurs. Does the needle remain at zero from startup? Is it frozen at 30 mph or another reading after the ignition is switched off? Does it work intermittently, perhaps after a bump or when the cabin is warm? These details are valuable for accurate diagnosis.

Check whether related functions have failed. If the odometer and cruise control have also stopped working, a missing vehicle-speed signal is more likely. If the odometer still counts mileage accurately but the needle does not move, the speedometer motor or cluster circuitry becomes a stronger suspect.

Also look for ABS, traction control or engine-management warning lights. A wheel-speed sensor fault can affect several systems at once. A diagnostic scan may reveal stored fault codes, but codes alone do not prove that the instrument cluster is faulty. A good diagnosis compares the speed data seen by the relevant control modules with what the cluster is displaying.

Do not try to force the needle round by hand through the clear lens. The pointer, spindle and stepper motor are delicate. Forcing it can turn a repairable internal fault into a more expensive gauge replacement and may damage the dial face.

Common fault patterns and their likely causes

Needle stuck at zero while driving

When the speedometer stays at zero, first consider whether the car has a valid speed signal. ABS or traction-control warnings, a non-working odometer and loss of cruise control can all support a sensor, wiring or module fault. On older vehicles, a dedicated gearbox-mounted speed sensor may be involved.

If live diagnostic data confirms that the vehicle is reading road speed correctly but the dash remains at zero, the fault is likely inside the instrument cluster. This could be a failed stepper motor, a poor solder joint, damaged track or component failure on the cluster board.

Needle stuck above zero when parked

A needle that remains at a speed reading with the ignition off often suggests a gauge motor or pointer-position problem. The gauge may not complete its normal return movement, or its internal reference position may have been lost.

Some vehicles perform a needle sweep or self-test at startup. If the speedometer needle fails that test while other gauges work normally, it is a useful indication that the gauge mechanism requires specialist attention.

Needle moves but gives the wrong speed

A consistently inaccurate speedometer can have different causes. Incorrect tyre sizes or wheel changes can alter the calculated road speed slightly, while a faulty cluster motor may cause a needle to lag, jump or over-read dramatically. A needle that only begins moving after 20 mph, or rises in sudden steps, is not a normal calibration issue.

Avoid attempting a DIY recalibration unless you have confirmed the vehicle’s specification and the fault source. Modern clusters are often coded to the vehicle and contain mileage and configuration data. Random adjustment can leave the reading less accurate than before.

Several gauges or displays fail together

When the speedometer fault comes with failed fuel or temperature gauges, pixel loss, dim backlighting, warning-light faults or a blank LCD display, the cluster is the most likely common point. Internal power-supply faults and board-level failures can affect multiple functions at once.

This is where a specialist bench test is more useful than replacing individual parts on guesswork. The cluster can be assessed using suitable emulators to replicate vehicle inputs and confirm whether it responds correctly before and after repair.

Why replacement is not always the best answer

A main dealer may recommend fitting a complete new instrument cluster. In some cases that is necessary, but it is not automatically the most economical route. Replacement clusters can be costly, may require programming and adaptation, and can introduce complications around mileage and vehicle coding.

A used cluster is not a straightforward shortcut either. It may carry another vehicle’s mileage, have incompatible software or coding, and contain the same age-related weaknesses as the original. Fitting one without proper configuration can cause warning lights, immobiliser issues or functions that do not operate as intended.

Repairing the original cluster generally preserves the vehicle’s existing mileage and coding. It also keeps the original unit matched to the car, avoiding the uncertainty that can come with second-hand parts. The right option depends on the fault, but a repair assessment should come before committing to a full replacement.

When to stop driving

A speedometer fault is more than an inconvenience. Without a reliable speed reading, it is difficult to stay within limits safely and legally, particularly on variable-speed roads. If the needle is intermittent or clearly inaccurate, do not rely on a sat-nav speed display as a permanent workaround.

The urgency increases if the fault is accompanied by ABS, braking, traction-control or engine warnings. Those systems need separate investigation because they may affect more than the dashboard display. Arrange diagnosis promptly and avoid unnecessary journeys until you know whether the vehicle has a wider safety-related fault.

Choosing a speedometer needle stuck fix

Once vehicle-side speed data has been checked, a suspected cluster should be removed carefully and assessed by a specialist. The repair should target the actual cause, whether that is a failed speedometer motor, damaged circuitry, display-related component or internal communication fault.

For motorists and workshops, the practical advantage of specialist repair is minimal downtime. Cartronix repairs original instrument clusters using dedicated test equipment, with postal coverage across the UK and while-you-wait workshop appointments where suitable. Repairs retain the original mileage and coding, rather than replacing the dashboard with an unknown unit, and are supported by a lifetime warranty for as long as you own the vehicle.

Before sending a cluster away, provide the vehicle make, model, year, engine details and a clear description of the symptoms. Mention any warning lights, intermittent behaviour, recent battery issues, jump-starting or water ingress. These details help separate a needle fault from a wider electrical problem and allow the repair to be focused from the start.

The right speedometer needle stuck fix does not always require complete dashboard replacement. Confirm the speed signal, protect the original cluster from DIY damage and have the unit properly tested when the evidence points to an internal fault. That approach is usually quicker, more economical and far more likely to leave the vehicle exactly as it should be.

how to test instrument cluster faults safely

How to Test Instrument Cluster Faults Safely

A dead speedometer, flickering warning lights or a display full of missing pixels can look like a failed dashboard. Sometimes it is. But knowing how to test instrument cluster faults properly can prevent an unnecessary replacement, protect the vehicle’s coding and identify whether the issue starts at the cluster at all.

Modern instrument clusters are control modules, not just dials and bulbs. They receive power, earths and data from other vehicle systems, then process that information for the driver. A fault in the battery supply, vehicle network, ABS system or ignition circuit can produce symptoms that appear to be a dashboard failure. The aim is to test methodically before removing or condemning the unit.

Test instrument cluster faults by recording the symptoms

Before connecting a diagnostic tool or removing trim, note what the cluster is doing. Does it fail completely, reset while driving, lose one gauge, show intermittent pixels or illuminate warning lamps incorrectly? Does the fault occur only when cold, after the vehicle has been parked, or when the headlights are switched on?

These details matter. A cluster that is entirely blank may have lost its main supply or earth. A speedometer that reads zero while other gauges work may point towards an ABS or wheel-speed signal issue. An LCD that fades, develops lines or loses pixels is more likely to be an internal display fault.

Also check whether other electrical systems are affected. Non-working radio memory, slow cranking, central locking issues or several random warning messages can indicate a weak battery, charging fault or poor vehicle earth rather than a single failed cluster.

Check battery voltage and charging first

Low voltage creates misleading faults on modern vehicles. A battery may still start the engine yet dip low enough during cranking to reset modules, trigger warning lights or cause the instrument cluster to behave erratically.

With the ignition off, a healthy fully charged 12V battery will normally read around 12.4V to 12.7V. With the engine running, charging voltage is commonly around 13.8V to 14.8V, although smart charging systems can vary this depending on load and battery condition.

If voltage is low, charge and test the battery before investigating the cluster further. Check the battery terminals for corrosion and ensure the main engine and body earth straps are secure. A voltage test alone is useful, but a voltage drop test under load is better where intermittent electrical faults are suspected.

Check relevant fuses, supplies and earths

Use the vehicle wiring diagram where possible. Fuse locations and pin assignments differ significantly by make, model and year, so never rely solely on a fuse label or an internet diagram for a similar vehicle.

Check the fuses feeding the instrument cluster, ignition supply and body control module. Do not just inspect them visually. Test for voltage on both sides of the fuse with the correct ignition state selected. A fuse can look intact but have poor contact in the fuse box, while an ignition-fed supply may only be live in a particular key position.

At the cluster connector, test for the correct permanent battery feed, ignition-switched feed and earths. Back-probing should be done carefully with suitable probes to avoid spreading terminals or damaging wiring. A good earth should be verified with a voltage drop test, especially when the cluster is powered and loaded. Continuity alone does not always reveal a weak, corroded or high-resistance earth connection.

If power and earth are missing, the cluster is not the first repair. Trace the supply fault through the fuse box, ignition circuit, wiring loom or body control module.

Scan every relevant control module

A basic code reader may only access engine faults. For instrument cluster diagnosis, use a capable diagnostic tool that can communicate with the vehicle’s full module network, including the dashboard, body control unit, ABS, steering column electronics and gateway where fitted.

Read and save all fault codes before clearing anything. Look particularly for communication faults, low-voltage codes, wheel-speed sensor faults and errors referring to the instrument panel. A ‘no communication’ code does not automatically prove the cluster has failed. It may be caused by a network wiring issue, another module pulling the CAN network down, or a supply problem.

Live data is often more useful than fault codes. Compare the speed shown by the ABS module with the speed displayed on the dashboard. Check engine speed, coolant temperature and fuel level data where available. If the source module reports sensible information but the gauge remains dead, the fault is more likely to be within the cluster or its communication path.

Test the cluster’s own functions

Many vehicles offer a gauge sweep, warning-light test or output test through diagnostic equipment. This commands the needles, lamps and display functions directly, allowing you to separate a failed gauge motor or display from a missing external signal.

If a commanded gauge sweep moves all needles correctly but the speedometer does not work on the road, investigate the speed data source and network communication. If one needle sticks, twitches or fails during the output test, an internal stepper motor or circuit board fault becomes more likely.

Some clusters have a hidden self-test routine accessed through steering wheel buttons or the trip reset button. Use these only when the correct method is confirmed for the vehicle. Avoid experimenting with coding menus, adaptation functions or mileage-related settings. Incorrect changes can create further faults and may require specialist rectification.

Inspect connectors and water damage carefully

With the battery disconnected only where the manufacturer’s procedure requires it, inspect the cluster connector and surrounding wiring for signs of damage. Look for loose terminals, green corrosion, moisture, overheated pins, broken locking tabs and previous repair work.

Water ingress is a common cause of intermittent dashboard faults. Damp carpets, leaking windscreens, blocked drains and water entering through bulkhead areas can affect wiring and modules behind the dashboard. A fault that appears after heavy rain or washing the vehicle deserves particular attention.

Do not spray contact cleaner into a connector as a first response, and do not force plugs back together. Find the cause of corrosion or moisture first. Cleaning a terminal without addressing the leak often results in the same fault returning.

When the fault is likely to be inside the cluster

Internal cluster faults have recognisable patterns. These include missing or faded LCD pixels, backlighting that is dim or completely out, failed warning lights, erratic gauges, repeated resets, blank screens, and a unit that will not communicate despite confirmed supplies, earths and network wiring.

At this point, a specialist bench test is usually the sensible next step. The cluster can be tested using dedicated emulators that reproduce vehicle inputs and communication signals outside the car. This confirms the fault without relying on guesswork or replacing expensive parts unnecessarily.

Replacement clusters can create complications. Many are coded to the donor vehicle, may show incorrect mileage, require programming and can introduce compatibility issues. Repairing the original unit generally preserves the vehicle’s mileage and coding, avoids main dealer replacement costs and reduces downtime. For owners and garages needing a fast answer, Cartronix can assess and repair original instrument clusters with postal or workshop options, backed by a lifetime warranty for as long as you own the vehicle.

Mistakes to avoid when you test instrument cluster faults

Do not condemn the dashboard because a warning lamp has appeared. For example, an ABS warning light and inactive speedometer may be caused by a wheel-speed sensor or ABS module fault, not the cluster itself. Equally, do not assume a scan tool code identifies the failed component. Fault codes guide testing; they are not a substitute for it.

Avoid fitting a used cluster simply to see if it works. On many vehicles this can create immobiliser, coding and mileage issues. It may also fail for the same external reason as the original unit.

Finally, do not test unknown pins with a powered test lamp. Modern module circuits and communication lines can be damaged by incorrect probing. A quality multimeter, wiring information and a suitable diagnostic tool are the minimum starting point. Oscilloscope testing may be needed for intermittent CAN faults or distorted signal lines.

Can I drive with an instrument cluster fault?

It depends on the fault. If speed, warning lamps, fuel level or temperature readings are unreliable, driving may be unsafe and could leave you unaware of a serious vehicle problem. A complete cluster failure can also affect MOT-related warning indications. Arrange diagnosis before using the vehicle normally.

Why does my instrument cluster work intermittently?

Intermittent faults are often linked to low voltage, poor connections, cracked solder joints, heat-related electronic faults or water ingress. Record when it happens and whether temperature, bumps in the road or electrical load changes affect it. That information makes testing far quicker.

A careful test sequence protects both the vehicle and your budget. To test instrument cluster faults safely, confirm the basics and compare live data. Test the outputs before deciding whether the original unit needs specialist repair.

why is my dashboard display flickering

Why Is My Dashboard Display Flickering in My Car?

A dashboard display that flashes, fades or cuts in and out is more than an annoyance. If you are asking, why is my dashboard display flickering, start with the electrical supply and the cluster itself. A weak battery connection can cause the fault, but so can failing electronics inside the instrument cluster. The difference matters, particularly if warning lights, the speedometer, fuel gauge or mileage display are affected at the same time.

Why is my dashboard display flickering?

Most flickering dashboard displays come down to an unstable power supply, a poor electrical connection or an internal cluster fault. The pattern of the fault gives useful clues. A display that flickers only while starting may point towards battery voltage. Heat and vibration offer useful clues. A fault that worsens as the cabin warms often points to a failing cluster connection or component.

Modern instrument clusters are electronic control units, not simply a collection of bulbs and gauges. Behind the fascia are circuit boards, soldered connections, display drivers, voltage regulators and communications circuitry. A fault in any of these areas can leave the display dim, intermittent or completely blank.

Low battery voltage or charging faults

Start with the battery, especially if the display flickers during cranking or just after the engine starts. Starting a vehicle places a heavy load on the battery. If voltage drops too far, the cluster can reset, the LCD may flicker and several warning lights can briefly appear.

The alternator and its wiring also need consideration. The alternator can also cause flickering. Overcharging, undercharging or uneven output can disturb dashboard illumination and other vehicle electronics. Look for wider electrical symptoms too. Slow windows, a battery warning light or headlights that change with engine speed point beyond the cluster.

A basic battery and charging-system test is usually quick for a garage to carry out. Do not assume that a battery is healthy simply because the engine still starts. It can have enough power for starting while still dropping voltage under load.

Poor earths, connectors and wiring

A loose battery terminal, corroded earth point or poor connector can interrupt the power or signal reaching the instrument cluster. Moisture, vibration and age all damage dashboard electronics over time. Vehicles affected by windscreen leaks or previous dashboard work deserve particular attention.

The fault may be intermittent at first. For example, the display may work on a cold morning. It may then flicker over rough roads or as the cabin warms. Check the radio, heater controls and interior lights. Similar faults in those systems make a wiring or earth issue more likely.

However, a flickering display with otherwise normal vehicle electrics should not automatically be blamed on the wiring. Internal cluster connections can produce exactly the same symptoms.

Failing LCD, pixel display or backlight

Many dashboards use LCD panels or dot-matrix displays for mileage, trip information, clock settings and warning messages. Over time, these displays can suffer pixel loss, fading, flashing or lines across the screen. In some models, the screen itself is sound but the ribbon connection or display driver has deteriorated.

Backlight faults are another common issue. The information may still be present, but only visible in certain light or when viewed from an angle. A failing backlight can look like a flickering display, particularly at night when the dash illumination is turned up.

Older modern vehicles often develop this fault. Later cars can suffer too when heat cycles and ageing damage the display circuit. Replacing a complete cluster is rarely the only answer.

When dashboard display flickering points to the cluster

Internal electronics become the leading suspect when the dashboard alone flickers while the engine runs. Common causes include cracked solder joints, failing capacitors, worn display connections and voltage-regulation faults on the circuit board.

These faults can be temperature-sensitive. A cluster may flicker for ten minutes, then settle down once warm. Or it may work perfectly after a cold start but fail once the cabin heats up. Tapping the dash may restore it briefly. However, that does not repair the underlying issue.

Some vehicles develop further symptoms as the fault progresses. Watch for other cluster symptoms. Gauges may drop to zero, warning lights may dim and the mileage display may disappear. At this point, proper bench testing is the most reliable way to confirm the fault.

Checks to make before booking a dashboard repair

Start with the simple checks, but avoid dismantling the instrument panel unless you have the right experience. Modern dashboards contain sensitive trim, airbag components and coded electronics.

First, consider when the flickering occurs. Does it happen only on start-up, over bumps, with headlights on, after rain, or once the vehicle is warm? Make a note of any warning messages and whether the gauges continue to work. Record a short video of the fault. Intermittent problems may disappear before the vehicle reaches a workshop.

Next, check for obvious battery-terminal corrosion or loose connections. Arrange a charging-system test first if the battery warning light stays on or wider electrical issues appear. A diagnostic scan may reveal low-voltage codes or communication errors. However, codes alone do not prove that the cluster has failed.

Choose a specialist instrument cluster assessment when the display has dead pixels, dim sections or persistent flicker. This route also suits repeated information loss when the rest of the car works normally.

When it is safe to keep driving – and when it is not

A brief flicker during a difficult cold start may not stop you driving. Investigate it if the fault becomes regular. The risk increases when you cannot reliably see your speed, fuel level, warning lights or engine temperature.

Stop and assess the vehicle if a red warning or battery light remains on. Do the same if you cannot read the temperature gauge or speedometer. These are not faults to ignore. A flickering display can hide an overheating, charging or oil-pressure warning. These alerts need immediate attention.

Garages should separate an intermittent cluster fault from a CAN or power-supply issue before removing the unit. A specialist can test many clusters with dedicated emulators. This equipment recreates vehicle signals and finds faults that a general scan tool may miss.

Repairing the original cluster versus replacing it

Main dealer replacement can cost significantly more. A new cluster may also need coding, configuration and mileage programming. Depending on the vehicle, it can also involve delays while the replacement unit is ordered.

Repairing the original instrument cluster is often the better option when the fault is internal. The original mileage, coding and vehicle identity remain with the unit, avoiding unnecessary programming complications. It is also a more economical approach where the display, gauges and warning-light functions can be restored at component level.

The right repair depends on the fault. A battery or vehicle-wiring problem must be corrected on the vehicle. A failed LCD, display driver, power circuit or solder connection within the cluster needs specialist electronic repair. Treating the wrong cause can waste time and money.

Cartronix provides instrument cluster repairs for common display, pixel, gauge and warning-light faults. Postal and while-you-wait options cover suitable units. Technicians repair original units instead of routinely replacing them. The repair includes a lifetime warranty for as long as you own the vehicle.

If your dashboard has begun flickering, act while the fault is still intermittent. Record when the flicker happens and complete a basic voltage check. Persistent dashboard display flickering deserves a proper diagnosis. These details help locate the fault in the vehicle supply or the cluster.

how to fix a pixelated dashboard display

How to Fix a Pixelated Dashboard Display

A dashboard with missing lines, faded digits or a patchy information screen can make a perfectly usable vehicle difficult to live with. A proper pixelated dashboard display repair depends on whether the issue sits in the LCD, its connection or the wider instrument cluster.

For most modern vehicles, replacing the complete cluster is not the first or best option. A targeted repair can restore the original display while keeping the vehicle’s mileage, coding and configuration intact. That avoids unnecessary dealer replacement costs and often gets the car, van or motorhome back on the road far sooner.

What a pixelated dashboard display usually looks like

Pixel failure is not always as obvious as a completely blank screen. You may see missing sections of letters, numbers that disappear when the cabin is warm, vertical or horizontal lines through the display, or a screen that works intermittently when the dashboard is tapped or the vehicle goes over a bump.

The fault commonly affects the centre information display within the instrument cluster. Depending on the vehicle, that screen may show mileage, time, outside temperature, warning messages, radio information, gear position, trip data or service prompts. When pixels fail, important information can become unreadable even though the speedometer and other gauges still appear to work normally.

A pixelated display should not be confused with a dim backlight. A dim display is visible but poorly illuminated, especially at night. Pixel loss leaves parts of characters or graphics permanently missing, distorted or flickering. The distinction matters because the repair method is different.

Why dashboard pixels fail

Instrument clusters live in a harsh environment. They are exposed to heat from direct sunlight, cold starts, vibration, electrical fluctuations and years of use. Over time, the flexible ribbon connection between the LCD and the cluster circuit board can deteriorate. On other units, the LCD panel itself fails, or a fault develops within the display driver circuitry.

Heat is often a useful clue. If the display is worse after the car has been parked in the sun, then improves when cold, a failing ribbon connection or ageing display components are likely. If the fault is present all the time and gradually spreads, the LCD may be reaching the end of its service life.

Water ingress can also cause display faults, particularly where a leaking windscreen, blocked scuttle drains or a damp interior has affected electrical components. In this situation, it is worth finding and resolving the source of moisture as well as repairing the cluster. Otherwise, the replacement display or repaired electronics may be exposed to the same problem again.

How pixelated dashboard display repair works

The first step is to confirm that the cluster is the cause. Check whether the display brightness can be adjusted and whether the fault changes with the ignition position, headlights on or off, or cabin temperature. A weak vehicle battery can create unusual warning lights and temporary display behaviour, but it does not usually cause a consistent pattern of missing pixels.

If the vehicle has other electrical symptoms, such as non-functioning gauges, intermittent warning lights, loss of communication or repeated fault codes, the issue may extend beyond the LCD. A proper diagnostic assessment is then needed before any display repair is carried out.

For a genuine pixel fault, the instrument cluster normally needs to be removed, opened carefully and inspected. The repair may involve replacing the LCD screen, renewing the ribbon connection or repairing the circuit that drives the display. The exact procedure varies by make, model and year. An Audi cluster, for example, may have a different display design and known failure point from a Ford, Fiat, Alfa Romeo or Aston Martin unit.

Once repaired, the cluster should be tested under controlled conditions before it is refitted. This is where specialist equipment matters. Testing with an emulator allows the repaired unit to be checked for display operation, warning functions and gauge behaviour without relying solely on a quick vehicle test. It also helps identify faults that were hidden by the original display failure.

Why a DIY pixel repair can be a false economy

Online guides often suggest pressing the display ribbon, reheating connections or fitting a low-cost replacement screen. These methods can sometimes create a short-term improvement, but they carry real risks. Instrument clusters contain delicate needles, coded electronics and fragile circuit tracks. A small mistake can turn a display-only issue into a complete cluster failure.

There is also the question of correct parts. Screens that look similar may have different pin layouts, resolutions, polarising layers or driver requirements. An incorrect LCD can show reversed colours, poor contrast, incomplete characters or no display at all. Adhesives and ribbon bonding also need to be applied accurately and cleanly to remain reliable through changing temperatures.

Removing the cluster itself is another point where care is needed. Trim panels, airbag-related areas and steering column covers can be damaged if the correct procedure is not followed. On some vehicles, disconnecting or reconnecting the unit incorrectly may store fault codes or create additional warning messages.

A DIY approach may be reasonable for an experienced electronics technician working on a non-critical spare unit. For most drivers and garages, professional cluster repair is the more predictable route. It protects the original unit and avoids the cost, programming delays and mileage concerns that can come with a replacement dashboard.

When replacement is not the answer

A main dealer may recommend fitting a new instrument cluster. This can be appropriate where the casing is severely damaged, the electronics are beyond economical repair or the correct replacement process is required by the manufacturer. However, it is not automatically necessary for pixel loss.

A replacement cluster can involve ordering delays, coding, immobiliser matching and mileage configuration. It may also leave the owner with a unit that no longer matches the vehicle’s original equipment history. For trade customers, it can keep a customer’s vehicle occupying workshop space longer than it should.

Repairing the original unit generally means its existing mileage and coding are retained. It is also a more economical option when the fault is limited to the screen or its associated electronics. The key is accurate diagnosis first. If the cluster has multiple failures, the repair should address the underlying cause rather than simply fitting a new LCD and hoping for the best.

Checks to make before booking a repair

A clear description of the fault helps identify the likely repair quickly. Note whether the pixels disappear only when warm, whether the screen is completely blank or partially readable, and whether gauges or warning lights are affected at the same time. A photograph of the display with the ignition on can be useful, particularly where the fault is intermittent.

Have the vehicle details ready, including make, model, year and registration. The cluster part number can help where it is accessible, but do not remove the unit just to find it unless you are confident with the process. For garages, include any diagnostic fault codes and the results of basic battery and charging checks.

Do not ignore safety-related messages simply because the display is difficult to read. If the vehicle is showing a brake, airbag, engine oil pressure or charging-system warning, stop and investigate the warning according to the vehicle handbook. Restoring pixels makes the message visible again, but it does not remove a genuine fault elsewhere on the vehicle.

Pixelated dashboard display repair with minimal downtime

For a display fault with no wider vehicle issue, specialist repair offers a practical balance of cost, speed and reliability. Cartronix repairs original instrument clusters for motorists and trade customers across the UK, with postal repairs and while-you-wait workshop appointments available for suitable units. The focus is on repairing the fault, not selling an unnecessary replacement cluster.

Turnaround will depend on the exact vehicle and fault, but a repair service should be clear about what is being repaired, how the unit will be tested and what warranty applies. A lifetime warranty tied to vehicle ownership provides useful reassurance where a known display failure has been corrected properly.

Pixelated dashboard display repair is more than a cosmetic improvement when missing pixels hide mileage, warnings and vehicle information. Get the fault assessed early, retain the original cluster where repair is viable, and you can restore a clear, dependable display without the disruption of a full dealer replacement.

postal instrument cluster repair service

Postal Instrument Cluster Repair Explained

When a dashboard starts flickering, drops its backlighting or stops talking to the rest of the vehicle, the usual worry is the same – expensive replacement, coding issues and days off the road. In many cases, postal instrument cluster repair is the more practical answer. A postal service lets a specialist test, repair and return the original unit quickly. This avoids the cost and disruption of fitting a brand-new cluster.

For UK motorists, independent garages and dealerships, that matters because modern instrument clusters are not simple plug-and-play parts. They often store mileage, configuration data and vehicle-specific coding. Replacing the unit can mean extra programming, compatibility checks and higher parts costs. Repairing the original cluster avoids most of that hassle and usually gets the vehicle back into service sooner.

What postal instrument cluster repair actually involves

A postal repair service is straightforward. The customer or garage removes the instrument cluster, packs it securely and sends it to a specialist for testing and repair. Once testing confirms the fault, the specialist repairs the unit at component level and returns it ready to refit.

That sounds simple, but the value is in the diagnostic process. Power supply issues, communication problems or intermittent faults elsewhere in the vehicle can mimic a failed cluster. A proper specialist uses dedicated equipment and emulators to reproduce the failure, complete the repair and check the result accurately.

This is the key difference between guesswork and a proper repair. If the problem sits inside the cluster, a specialist can often resolve it without altering the vehicle’s stored mileage or coding. If the fault is not in the cluster, a good specialist should be able to identify that early, which saves time and unnecessary cost.

Common faults fixed through postal instrument cluster repair

Most drivers notice the fault before they know what the cluster actually does behind the scenes. It may begin with a dim display, dead gauges or random warning lights. In other vehicles, the LCD fades, pixels disappear or the speedometer stops reading correctly.

Some of the most common issues sent in for repair include failed or intermittent illumination, gauge malfunctions, complete cluster shutdown, pixel loss, blank LCD screens and warning lights that stay off or remain permanently on. Communication faults can also show up, especially in newer vehicles where the cluster forms part of the wider electronic network.

These symptoms can appear gradually or all at once. A dashboard that works when cold and fails once the cabin warms up often points to internal solder, component or board-level faults. A completely dead cluster may look terminal, but a technician can often diagnose and repair the underlying electronics.

Why repair is often better than replacement

Main dealer replacement has its place, but it is rarely the most economical route for an instrument cluster fault. New clusters can be expensive, and the final bill usually goes beyond the part itself. Coding, programming, immobiliser matching and vehicle downtime all add to the total.

Repairing the original unit keeps the vehicle’s own cluster in place. This usually preserves the existing mileage and coding, which removes a major concern for private owners and trade customers. It also avoids the risk of fitting an aftermarket or used unit with unknown history.

There is a practical benefit here too. A repaired original cluster is usually the fastest route back on the road. For garages, that means fewer bays tied up waiting for parts. For vehicle owners, it means less disruption and a clearer idea of timescales from the start.

Who uses a postal repair service?

Postal repair is not just for drivers who cannot get to a workshop. It suits several types of customer.

Private owners use it when they want a cost-effective fix without paying dealer prices. It is especially useful for cars, vans and motorhomes where dashboard faults make the vehicle difficult or unsafe to use.

Independent garages use postal repair when a cluster fault sits outside general workshop electronics work. Instead of outsourcing blindly or replacing parts on trial, they can send the unit to a specialist and get a confirmed repair.

Dealerships and trade customers use it for the same reason – speed, consistency and reduced replacement cost. Even larger operations gain nothing by replacing an expensive cluster when a specialist can repair and return the original quickly.

What to check before sending a cluster away

Before arranging postal instrument cluster repair, it helps to confirm the basics. A flat battery, blown fuse, poor earth or vehicle-side wiring fault can mimic a failed cluster. If the unit receives no power, complete those checks before removing and posting it. Otherwise, the process may only add delay.

For garages and technicians, this means verifying feeds, grounds and network communication first. For private owners, it usually means describing the fault as clearly as possible when booking. Intermittent problems, warning messages, total failure, dead needles or dim screens all help build a clearer picture before testing starts.

Also check whether the vehicle remains safe to drive without the cluster in place. In many cases, leave the vehicle off the road until you refit the unit. This matters especially when the fault affects speed, warning lights or critical driver information.

Turnaround matters as much as price

A low repair price is not much use if the vehicle is off the road for a week. That is why turnaround is such a big part of the decision.

A specialist should process most common cluster faults quickly. Depending on the unit and fault, the team can often complete the work on the day it arrives or by the next working day. That makes a real difference for workshops managing customer bookings and for owners who rely on the vehicle daily.

The other point to look at is what the quoted price includes. Transparent pricing with VAT included is easier to work with than an attractive headline number followed by testing charges, hidden extras or uncertain warranty terms. A proper repair service should be clear about cost, likely turnaround and what happens if the unit turns out not to be repairable.

Why warranty and originality retention matter

An instrument cluster is a critical electronic module. It is not just a display panel. It communicates with the rest of the vehicle and presents information the driver depends on. Because of that, repair quality matters far more than a quick cosmetic fix.

A meaningful warranty confirms that the specialist completed the repair properly and tested the unit before return. For vehicle owners, that reduces the risk of paying twice. For garages, it means fewer comebacks and better confidence when handing the vehicle back to the customer.

Originality retention is just as important. Keeping the factory-fitted cluster preserves the vehicle’s original configuration and avoids adapting it around a replacement part. This matters particularly on newer vehicles and models that tie coding and stored data closely to the original unit.

Choosing the right postal instrument cluster repair specialist

Not every electronics repair service has the equipment or automotive experience to handle modern dashboards properly. The right specialist should understand make-specific and model-specific faults, not just generic circuit board repairs. Audi, Ford, Fiat, Alfa Romeo and Aston Martin clusters can all fail in different ways, and correct diagnosis depends on experience with those patterns.

Look for a service that deals specifically with instrument clusters, speedometers, displays and dashboard electronics rather than general consumer electronics. The ability to test with specialist equipment, confirm known failure points and return the unit promptly is what separates a proper automotive repair specialist from a general repair bench.

Cartronix is one example of that specialist approach, offering UK-wide postal repairs alongside workshop appointments, model-specific diagnostics and repairs that preserve the original unit rather than pushing unnecessary dealer replacement.

If your dashboard has started failing, the best time to act is before the fault becomes total. A dim display or intermittent gauge may seem manageable for now, but these issues rarely improve on their own. A prompt repair of the original cluster usually avoids higher costs, longer downtime and unnecessary frustration later.

dealer replacement versus specialist repair for instrument cluster faults

Dealer Replacement Versus Specialist Repair

Dealer replacement versus specialist repair is one of the first decisions owners face when an instrument cluster starts to fail. A main dealer may quote for a complete new dashboard unit, but many faults only need the original cluster repaired by a specialist.

That difference matters. A faulty speedometer, dim LCD, dead gauges or warning lights that stop working do not always mean the whole cluster has reached the end of its life. Many faults sit in known display circuits, power sections, solder joints or gauge components. A repair bench can test those areas directly.

dealer replacement versus specialist repair for instrument cluster faults

Dealer replacement versus specialist repair: what changes?

A dealer replacement usually follows a parts-led route. The workshop identifies the faulty cluster, orders a new or exchange unit, books the vehicle back in and codes the replacement to the car. That process can work, but it often costs more and takes longer than customers expect.

Specialist repair starts with the original unit. The technician diagnoses the cluster at component level, repairs the failed section and bench-tests the unit before return. This approach keeps the original housing, software family, mileage data and vehicle configuration in place where the unit allows it.

Modern clusters do far more than show speed and fuel level. They link into immobiliser systems, CAN communication, vehicle options and recorded mileage. Because of that, replacing the unit can add coding, synchronisation and compatibility steps that a repair may avoid.

Dealer replacement versus specialist repair costs

Main dealers often choose replacement because it fits the manufacturer process. They can order parts, follow factory routines and code the new unit with dealer equipment. That route suits the dealer network, but it does not always give the customer the best value.

A replacement cluster charges you for the whole assembly. If the real fault is a failed backlight circuit, missing pixels, a gauge motor issue or a common display fault, a full replacement can be disproportionate. Older vehicles, imported models and less common specifications can also suffer delays while the correct part is sourced.

There is also the issue of originality. Your existing cluster already belongs to the vehicle. It has the right casing, connectors, configuration and, in many cases, stored data. Repairing it avoids many of the complications that can come with fitting another module.

Dealer replacement versus specialist repair: when repair makes sense

Specialist repair works best when the fault is known, repeatable and testable. Common examples include missing pixels, complete LCD failure, flickering illumination, intermittent needles, no ignition response, loss of communication and full cluster shutdown.

Drivers usually notice the cost saving first. You pay to fix the failed section, not to replace the entire assembly. Garages also benefit because they can keep the customer job moving without tying up a ramp or sending the customer back to the dealer.

Proper test equipment matters here. A specialist can power the unit on the bench, simulate faults and confirm whether the repair has restored function before the cluster returns to the vehicle. Guesswork creates delays. Bench testing reduces them.

Dealer replacement versus specialist repair for mileage and coding

The biggest practical difference often appears around mileage, coding and vehicle identity. With replacement, the new cluster may need immobiliser pairing, configuration, adaptation and mileage handling. The exact work depends on the make and model.

With repair, the original cluster normally stays with the vehicle. That helps preserve the original coding and recorded mileage in the same unit. For many owners and trade customers, this makes the job more predictable.

You can also cross-check recorded mileage against official records, such as the GOV.UK MOT history service, before and after repair work. That gives owners, buyers and garages another reference point when dashboard faults involve display or mileage concerns.

Dealer replacement versus specialist repair downtime and risk

Cost matters, but downtime matters too. A failed dashboard can take a private car off the road. It can also stop a van, motorhome or trade vehicle earning money.

Replacement can drag on because the part must arrive and the vehicle must return for coding. Specialist repair can move faster because the same unit comes back after testing. Postal repair and while-you-wait appointments can reduce delays further when the fault is common.

Some customers assume a new unit must be safer. That is not always true. The safer route depends on the fault, the vehicle and the provider. A diagnosed repair with clear warranty cover can carry less risk than introducing a replacement module that needs coding.

When replacement still has a place

Repair is not the answer for every failed cluster. Severe liquid damage, fire damage, heavy PCB destruction or previous failed repair attempts can make replacement more sensible. Some units also have multiple faults that push the repair beyond economical value.

The cluster may not be the root cause either. Wiring faults, low system voltage, gateway issues and other module problems can mimic a dashboard failure. A good repair decision starts with diagnosis, not assumptions.

A reliable specialist should say when repair makes sense and when it does not. That honesty protects the customer and the workshop.

Questions to ask before choosing

Before you approve a full replacement, ask what has actually failed. Has anyone confirmed the fault sits inside the cluster? Will the replacement need coding? How long will the vehicle stay off the road? What happens to mileage data? What warranty comes with each route?

Those questions make the comparison clearer. They also help you avoid comparing a cheap headline repair with a replacement quote that later adds coding, parts delays or extra diagnostic time.

For many UK motorists and garages, the practical answer is simple. If the original instrument cluster can be tested, repaired and returned with warranty, specialist repair is often the better first option.

Choosing the right repair route

Put simply, replacement buys another unit. Repair restores the unit you already have. Replacement has its place when the original cluster is beyond recovery, but it should not be the automatic first step for every dashboard fault.

Cartronix focuses on repairing original instrument clusters, LCD displays, speedometers and dashboard faults where repair is viable. Related guides on repairing the original cluster, instrument cluster repair cost and dashboard repair turnaround time can help you compare the options before booking work.

If you are facing a failed dashboard, challenge the idea that new automatically means better. The right specialist repair can be cleaner, quicker and more economical than paying for a complete unit you may not need.

What Causes Dashboard Backlight Failure?

What Causes Dashboard Backlight Failure?

You usually notice it at the worst possible time – on a dark road, in poor weather, or halfway through an early morning commute when the speedometer and fuel gauge suddenly become hard to read. If you are wondering what causes dashboard backlight failure, the answer is rarely as simple as one blown bulb. On modern vehicles, dim or failed dashboard illumination can come from anything between a basic power supply fault and an internal instrument cluster failure.

For drivers and workshops alike, the key point is this: the backlight is only the visible symptom. The real fault may sit in the lighting circuit, the cluster electronics, or the display itself. That is why some dashboards fail gradually, some flicker for weeks, and others go dark without warning.

What causes dashboard backlight failure in modern vehicles?

Older dashboards often relied on replaceable bulbs, so a failed backlight could sometimes be traced to one simple component. From the late 1990s onwards, many vehicles moved towards more integrated instrument clusters using surface-mounted LEDs, onboard voltage regulation and delicate printed circuit boards. That changed the repair process completely.

In practical terms, what causes dashboard backlight failure today usually falls into one of three areas: failed illumination components, electrical supply issues, or internal cluster faults. The challenge is that these faults can look identical from the driver’s seat. A cluster with failing internal solder joints can appear no different to one with a separate dimmer or power feed issue.

This is where proper testing matters. Replacing the entire dashboard unit without confirming the cause can become expensive very quickly, especially when coding, mileage retention and parts availability are involved.

The most common causes of dashboard backlight failure

A failed bulb or LED is still one of the most common reasons for poor illumination, but it is not always the whole story. On some vehicles, one section of the cluster may go dim while the rest stays lit. That can point to individual component failure. On others, the entire backlight system drops out together, which often suggests a broader electrical or internal board fault.

Power supply issues are another frequent cause. Instrument clusters rely on stable voltage. If the supply to the cluster is interrupted by a blown fuse, wiring issue, poor earth or connector problem, the backlighting may stop working altogether or behave intermittently. Intermittent faults are particularly common where heat, vibration and age start to affect connections behind the dash.

The dimmer circuit can also be responsible. Many drivers assume a dark dash means the cluster itself has failed, when in fact the brightness control circuit is no longer adjusting correctly. That said, if the dimmer appears to work but the cluster remains patchy, flickers, or only comes back when tapped or when the cabin warms up, the fault is more likely inside the unit.

Internal circuit board failure is a major cause on modern instrument clusters. This can include failed resistors, damaged tracks, poor solder joints, degraded LED drivers or faults in the voltage regulation stage. These are not issues that can be solved by swapping a bulb. They require electronic diagnosis and component-level repair.

Why dashboard backlights fail gradually

Not every failure is sudden. In fact, a gradual change often tells you more about the fault than a total blackout does.

If the dashboard becomes dimmer over time, starts flickering, or works on some journeys but not others, that often points to heat-related stress within the cluster. Solder joints can weaken with repeated heating and cooling cycles. LEDs and their driver components can degrade. Connectors can develop resistance. The result is a cluster that still functions, but not reliably.

Vehicles used for frequent short journeys can show these symptoms just as much as high-mileage motorway cars. Age matters as much as mileage. A 15 to 20-year-old cluster may simply be reaching the point where electronic components are no longer operating consistently.

Moisture can also play a part, especially if the vehicle has had previous leaks, windscreen replacement issues or damp within the cabin. Even slight corrosion on connectors or circuit boards can affect backlighting performance long before the rest of the cluster shows obvious faults.

When the problem is not the backlight itself

A dark or unreadable cluster does not always mean the illumination has failed. Sometimes the display is working but the LCD panel, pixel layer or gauge face lighting is no longer visible as intended. This is common on certain makes and models where the display develops pixel loss, poor contrast or complete screen failure.

It is also possible for communication faults in the cluster to affect how the unit powers up. If the cluster has internal processor issues or unstable voltage regulation, the backlight may fail alongside gauge errors, warning light problems or intermittent total shutdown. In those cases, treating it as a simple lighting fault would miss the underlying issue.

That is why symptoms matter. A cluster that is only dark at night may have a different fault from one that also resets mileage displays, loses gauges or flashes warning lamps unexpectedly. The more complete the symptom picture, the easier it is to identify whether the fault is confined to illumination or part of a wider instrument cluster problem.

Can a fuse cause dashboard backlight failure?

Yes, it can, but not always in the way people expect. A blown fuse can cut power to the illumination circuit and leave the dashboard dark. That is one of the first things worth checking because it is quick and simple. However, if a replacement fuse blows again, there is usually another fault behind it.

Repeated fuse failure may indicate a short circuit, damaged wiring or an internal cluster issue drawing incorrect current. In that situation, fitting more fuses does not solve the problem. It only delays proper diagnosis.

Likewise, if the fuse tests fine but the backlight still fails intermittently, the issue is more likely to be connection-related or inside the cluster itself. This is why garages often need to go beyond basic checks and test the unit in a controlled way.

Why replacement is not always the best answer

Main dealer replacement can look like the straightforward option, but with instrument clusters it is often the most expensive route. Many units require coding, adaptation and mileage configuration. On some vehicles, brand new replacements are no longer available, or only supplied at a cost that makes little sense compared with repair.

Repairing the original unit has clear advantages. The vehicle keeps its own cluster, mileage and coding remain with the car, and turnaround is usually much faster than sourcing and programming a replacement. For trade customers, this also reduces workshop delays and avoids introducing second-hand units with unknown history.

It does depend on the extent of the damage. A unit with severe liquid ingress or heavy board damage may not always be economical to save. But for many backlight faults, professional repair is the sensible option because the fault sits in serviceable electronics rather than the whole cluster being beyond use.

Diagnosing what causes dashboard backlight failure properly

The right diagnosis starts with the symptoms, but it should not end there. If the backlight has failed, a proper assessment will typically consider whether the fault affects the whole cluster or one section, whether it is constant or intermittent, and whether any other dashboard functions are failing at the same time.

From there, electrical supply checks and specialist bench testing can confirm whether the issue lies outside the cluster or within it. This matters because replacing switches, fuses or dimmer controls without proof can waste time and money. Equally, condemning the cluster too early can mean missing a vehicle-side wiring problem.

For that reason, specialist instrument cluster repair is often the quickest route to a proper answer. A company such as Cartronix can test clusters using dedicated equipment and emulators, identify component-level faults and repair the original unit without dealer replacement costs.

When to get the dashboard repaired

If the dashboard backlight is flickering, partially dim, completely out, or failing alongside display and gauge issues, it is worth acting before the fault worsens. Many backlight problems start intermittently and become permanent later. Waiting can leave the vehicle harder to use safely at night and may lead to further strain on already failing components.

For independent garages and workshops, early repair also helps avoid repeat visits and uncertain fault tracing. If a known cluster fault pattern exists for a particular make or model, sending the unit to a specialist can often be faster than spending hours chasing an intermittent issue in the vehicle.

The practical takeaway is simple. Dashboard backlight failure is usually repairable, but only if the real cause is identified correctly. The sooner the fault is tested, the better the chance of a fast, cost-effective repair that keeps the original cluster in service.

A dim dashboard can look like a small annoyance until you cannot read the speedo on an unlit road. Once that starts happening, the best next step is not guesswork – it is a proper diagnosis.