
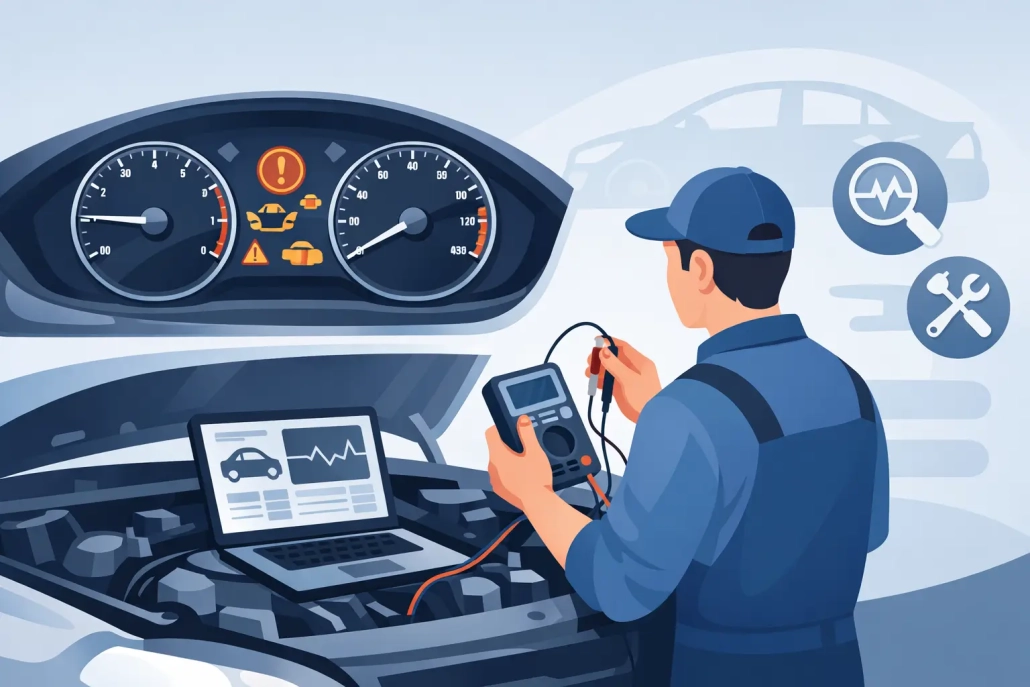
How to Test Instrument Cluster Faults Safely
A dead speedometer, flickering warning lights or a display full of missing pixels can look like a failed dashboard. Sometimes it is. But knowing how to test instrument cluster faults properly can prevent an unnecessary replacement, protect the vehicle’s coding and identify whether the issue starts at the cluster at all.
Modern instrument clusters are control modules, not just dials and bulbs. They receive power, earths and data from other vehicle systems, then process that information for the driver. A fault in the battery supply, vehicle network, ABS system or ignition circuit can produce symptoms that appear to be a dashboard failure. The aim is to test methodically before removing or condemning the unit.
Test instrument cluster faults by recording the symptoms
Before connecting a diagnostic tool or removing trim, note what the cluster is doing. Does it fail completely, reset while driving, lose one gauge, show intermittent pixels or illuminate warning lamps incorrectly? Does the fault occur only when cold, after the vehicle has been parked, or when the headlights are switched on?
These details matter. A cluster that is entirely blank may have lost its main supply or earth. A speedometer that reads zero while other gauges work may point towards an ABS or wheel-speed signal issue. An LCD that fades, develops lines or loses pixels is more likely to be an internal display fault.
Also check whether other electrical systems are affected. Non-working radio memory, slow cranking, central locking issues or several random warning messages can indicate a weak battery, charging fault or poor vehicle earth rather than a single failed cluster.
Check battery voltage and charging first
Low voltage creates misleading faults on modern vehicles. A battery may still start the engine yet dip low enough during cranking to reset modules, trigger warning lights or cause the instrument cluster to behave erratically.
With the ignition off, a healthy fully charged 12V battery will normally read around 12.4V to 12.7V. With the engine running, charging voltage is commonly around 13.8V to 14.8V, although smart charging systems can vary this depending on load and battery condition.
If voltage is low, charge and test the battery before investigating the cluster further. Check the battery terminals for corrosion and ensure the main engine and body earth straps are secure. A voltage test alone is useful, but a voltage drop test under load is better where intermittent electrical faults are suspected.
Check relevant fuses, supplies and earths
Use the vehicle wiring diagram where possible. Fuse locations and pin assignments differ significantly by make, model and year, so never rely solely on a fuse label or an internet diagram for a similar vehicle.
Check the fuses feeding the instrument cluster, ignition supply and body control module. Do not just inspect them visually. Test for voltage on both sides of the fuse with the correct ignition state selected. A fuse can look intact but have poor contact in the fuse box, while an ignition-fed supply may only be live in a particular key position.
At the cluster connector, test for the correct permanent battery feed, ignition-switched feed and earths. Back-probing should be done carefully with suitable probes to avoid spreading terminals or damaging wiring. A good earth should be verified with a voltage drop test, especially when the cluster is powered and loaded. Continuity alone does not always reveal a weak, corroded or high-resistance earth connection.
If power and earth are missing, the cluster is not the first repair. Trace the supply fault through the fuse box, ignition circuit, wiring loom or body control module.
Scan every relevant control module
A basic code reader may only access engine faults. For instrument cluster diagnosis, use a capable diagnostic tool that can communicate with the vehicle’s full module network, including the dashboard, body control unit, ABS, steering column electronics and gateway where fitted.
Read and save all fault codes before clearing anything. Look particularly for communication faults, low-voltage codes, wheel-speed sensor faults and errors referring to the instrument panel. A ‘no communication’ code does not automatically prove the cluster has failed. It may be caused by a network wiring issue, another module pulling the CAN network down, or a supply problem.
Live data is often more useful than fault codes. Compare the speed shown by the ABS module with the speed displayed on the dashboard. Check engine speed, coolant temperature and fuel level data where available. If the source module reports sensible information but the gauge remains dead, the fault is more likely to be within the cluster or its communication path.
Test the cluster’s own functions
Many vehicles offer a gauge sweep, warning-light test or output test through diagnostic equipment. This commands the needles, lamps and display functions directly, allowing you to separate a failed gauge motor or display from a missing external signal.
If a commanded gauge sweep moves all needles correctly but the speedometer does not work on the road, investigate the speed data source and network communication. If one needle sticks, twitches or fails during the output test, an internal stepper motor or circuit board fault becomes more likely.
Some clusters have a hidden self-test routine accessed through steering wheel buttons or the trip reset button. Use these only when the correct method is confirmed for the vehicle. Avoid experimenting with coding menus, adaptation functions or mileage-related settings. Incorrect changes can create further faults and may require specialist rectification.
Inspect connectors and water damage carefully
With the battery disconnected only where the manufacturer’s procedure requires it, inspect the cluster connector and surrounding wiring for signs of damage. Look for loose terminals, green corrosion, moisture, overheated pins, broken locking tabs and previous repair work.
Water ingress is a common cause of intermittent dashboard faults. Damp carpets, leaking windscreens, blocked drains and water entering through bulkhead areas can affect wiring and modules behind the dashboard. A fault that appears after heavy rain or washing the vehicle deserves particular attention.
Do not spray contact cleaner into a connector as a first response, and do not force plugs back together. Find the cause of corrosion or moisture first. Cleaning a terminal without addressing the leak often results in the same fault returning.
When the fault is likely to be inside the cluster
Internal cluster faults have recognisable patterns. These include missing or faded LCD pixels, backlighting that is dim or completely out, failed warning lights, erratic gauges, repeated resets, blank screens, and a unit that will not communicate despite confirmed supplies, earths and network wiring.
At this point, a specialist bench test is usually the sensible next step. The cluster can be tested using dedicated emulators that reproduce vehicle inputs and communication signals outside the car. This confirms the fault without relying on guesswork or replacing expensive parts unnecessarily.
Replacement clusters can create complications. Many are coded to the donor vehicle, may show incorrect mileage, require programming and can introduce compatibility issues. Repairing the original unit generally preserves the vehicle’s mileage and coding, avoids main dealer replacement costs and reduces downtime. For owners and garages needing a fast answer, Cartronix can assess and repair original instrument clusters with postal or workshop options, backed by a lifetime warranty for as long as you own the vehicle.
Mistakes to avoid when you test instrument cluster faults
Do not condemn the dashboard because a warning lamp has appeared. For example, an ABS warning light and inactive speedometer may be caused by a wheel-speed sensor or ABS module fault, not the cluster itself. Equally, do not assume a scan tool code identifies the failed component. Fault codes guide testing; they are not a substitute for it.
Avoid fitting a used cluster simply to see if it works. On many vehicles this can create immobiliser, coding and mileage issues. It may also fail for the same external reason as the original unit.
Finally, do not test unknown pins with a powered test lamp. Modern module circuits and communication lines can be damaged by incorrect probing. A quality multimeter, wiring information and a suitable diagnostic tool are the minimum starting point. Oscilloscope testing may be needed for intermittent CAN faults or distorted signal lines.
Can I drive with an instrument cluster fault?
It depends on the fault. If speed, warning lamps, fuel level or temperature readings are unreliable, driving may be unsafe and could leave you unaware of a serious vehicle problem. A complete cluster failure can also affect MOT-related warning indications. Arrange diagnosis before using the vehicle normally.
Why does my instrument cluster work intermittently?
Intermittent faults are often linked to low voltage, poor connections, cracked solder joints, heat-related electronic faults or water ingress. Record when it happens and whether temperature, bumps in the road or electrical load changes affect it. That information makes testing far quicker.
A careful test sequence protects both the vehicle and your budget. To test instrument cluster faults safely, confirm the basics and compare live data. Test the outputs before deciding whether the original unit needs specialist repair.









Trackbacks & Pingbacks
[…] causing the visible problem may be separate from the power-management circuit. This is why a specialist test is more useful than assuming every faulty display is flattening the […]
[…] is why accurate diagnosis matters. A specialist should assess the reported fault, vehicle model and known failure patterns […]
Comments are closed.